
Some of you may recognise this page from the WOW embossing powder stand at the NEC where you could pick up the accompanying instruction sheet. I just thought I'd answer one of the questions that came up and also show you a couple more pictures which might make the technique clearer. Any more questions leave me a comment and I'll reply asap.
What Dies did I use? - The dies I used for the banner are from Whimsy stamps. I got the die set from my local craft store but there is a link here to the product on the Whimsy stamps website.
Here are the instructions for anyone else who is interested plus photos:
Step 1 – Choose your background paper (I used Bazzill Dotted Swiss in a dark cream). Decide on the position of your photo and title.
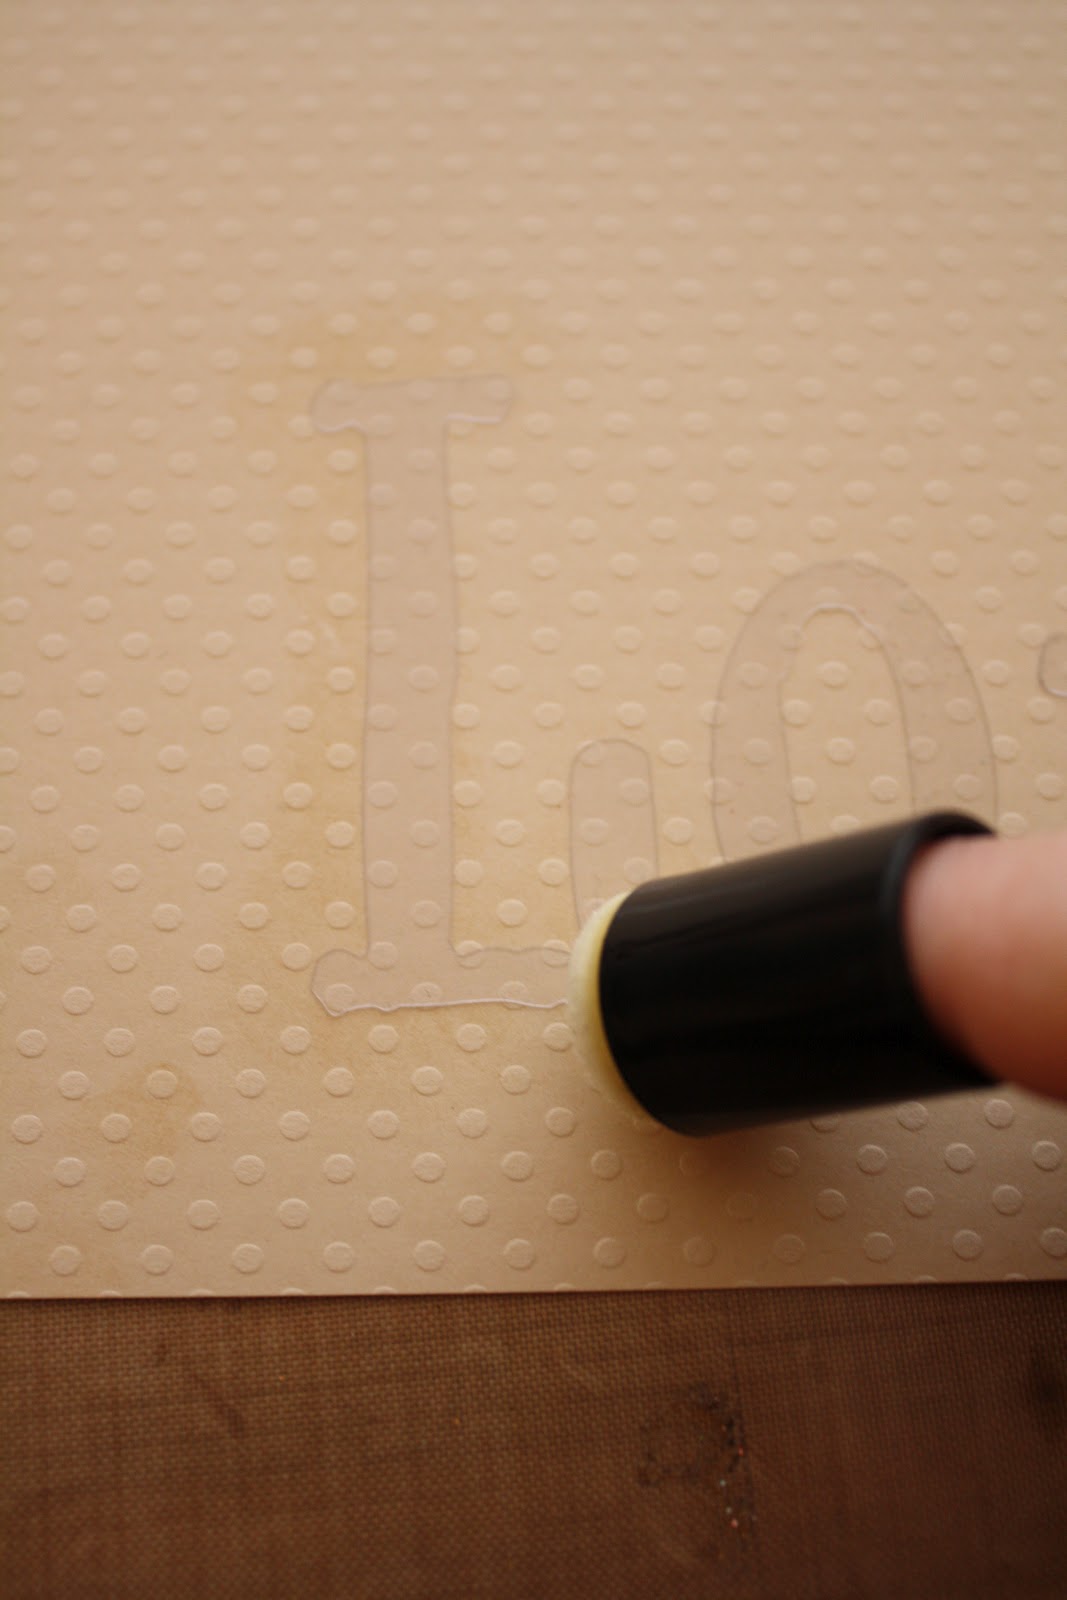
Step 2 – Using masks (e.g. Tim Holtz) or alphabet stickers position your title. Using a sponge dabber quickly apply versamark ink generously around the letters and then remove the letters while the ink is still wet. Apply WOW Ebony embossing powder, (tap off the excess and return to the pot), and heat.
Sorry, not the easiest colours to photograph!


Step 3 – Stick your photo down using your chosen adhesive e.g. double sided tape. Add stitching around the edge of the page if desired.
Step 4 – To make the banner first cut a number of rectangles of white card slightly larger than the die(s) or size(s) required. Apply WOWembossing powders in a number of colours e.g. Metalline Red, Apple Red, Opaque Primary Azure, Metalline Dark Blue, Metallic Blue. For some of the pennants apply embossing powder to give a solid colour. You could use one of the WOW Ultra high powders (e.g. Apple Red ultra high), use triple embossing, or both! To triple emboss - first apply versamark, then embossing powder, tap off the excess and return to the pot, heat the powder, whilst still hot apply more powder. Repeat the process for 3 layers if desired. For other pennants use WOW background stamps e.g. FunkyBorder Strips or Vintage Wallpaper
Step 5 – Use the die and a suitable die cutting machine and cut out the pennants. **I cut the top edge off some of the scalloped pennants to make a medium size.** If not available use scissors to make a template out of thick card and cut around this. Attach the pennants to string to make a banner using double sided tape, (apply the tape over the edge of the banner from the reverse and then fold over the string). Add a knot at each end of the string and adhere banner to page using foam pads to give dimension.

Step 6 – Finish by adding themed embellishments of your choice. **My buttons are from the Papermania Portobello Road collection.**
------------------------------------------------------------------------------------------------------
------------------------------------------------------------------------------------------------------
Photos of my projects on display at the NEC...


That´s fab! I love your London Layout and all your projects from the NEC! I wish I could be there too! xx Bianca
ReplyDeleteHi Amy loved seeing all the projects on the stands at the NEC, your London pages are great
ReplyDeleteAnne
x
Loved your work on display at the NEC - wonderful booth with amazing goodies!
ReplyDeleteThanks for the lovely comments. x
ReplyDelete